Wednesday, September 01, 2010
Labikeet Colors
We are revealing our newest round of 12x12 inch quilts over on Twelve by 12 today! This time, our color theme was "Lorikeet colors." Brenda, who lives in Australia, sees these bright birds in her yard all of the time (I've only seen them at the zoo!) and was inspired by their lively colors to choose this palette and see what we'd all do with it. I love that this challenge involves all of us sharing some of the color in her daily life. If you've not seen a lorikeet, here's what one looks like. Imagine, having these fly about your backyard!
I love bright fabrics, and I have lots of brights in my fabric stash. So my difficulty in approaching the challenge wasn't the color palette, but how to use them. I have such a literal brain that I kept getting stuck on lorikeets! I sure looked at a lot of pictures of them!
Coincidentally, I had just gotten Susan Carlson's new book Serendipity Quilts. In this new book, she's refined the free cutting fabric collage technique from her earlier book (remember all those great fish?) and I was eager to work a bit with that technique.
At some point as I was looking at lorikeets and their colors for inspiration, I started thinking about how funny it would look if other ordinary animals had these flashy markings. That thought amused me and it was an easy jump to imagine my lab/weimaraner mix Gemma as a "labikeet"!
To accomplish that, I started with a photo of Gemma that I thought had enough profile to allow me to show the colorful markings. Using that as my guide, I made a muslin base which I marked up with sharpie markers to show where I wanted the colors to go.
Using that as the base, I placed fabric pieces almost mosaic-style to create her markings and (trying to) create the shadows and highlights. Carlson's technique involves gluing the pieces down loosely using a glue stick or other flexible glue, and then trapping everything under a layer of tulle before stitching. To be honest, I found that sort of fiddly, as the little bits wanted to move around. I guess I was too light-handed with the glue! I'd be inclined to work with fusible next time -- although fusing the WonderUnder to the fabric is a step that takes some time, and this process allows you to jump right in with even tiny scraps that you happen to have lying around, the ease of working with un-adhered bits vs ones you can fuse in place makes the advance work worth it in the end, I think.
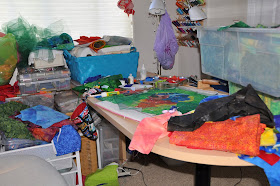
I made a heck of a mess while I was doing this -- fabric everywhere! The quilting was great fun at the end, and then I finished this with a simple facing.
Gemma is now "Labikeet!"
Be sure to hop over to the Twelve by 12 blog to see what the other 11 in the group did! You won't be disappointed!


Excellent!!
ReplyDeleteVery fun Diane. I love her method. I took a class from her several years ago and she used Ailene's tacky glue then. I still do - just dot a few dabs around the edges. It holds it in place so you can sew over it. I don't use netting over the top and it works fine.
ReplyDeleteHi~dear,
ReplyDeleteIt's so nice to found your blog,it's nice!!!I love it:)
My name is Esther!How are you today??
Can I invite you to visit my personal website?
To check my video on line,and give me some feedback!
Here it is : http://freedom.ws/summerbibo
Or my blogger :http://summerbibo.blogspot.com/
IF you want to give me some feedback
My Msn: summerbibo@hotmail.com.tw (<---e-mail also)
** Welcome to add me to be your friend :) Have A Nice Day!!
This is absolutely gorgeous! Your work is outstanding! And you know I have such a soft spot for those labs.
ReplyDelete