
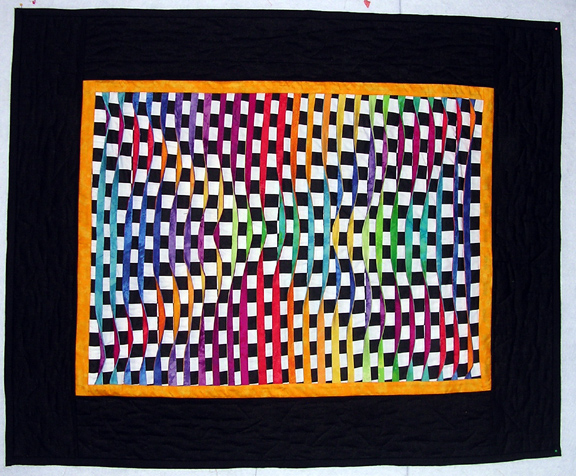
Finally. The finished "high tech tucks" quilt that I made for Roger's birthday! He loves it, and is excited to finally have a quilt he can hang in his office at school. Up 'til now, each time I've made a smaller quilt, he's asked "Can I have it to hang in my office?" and I've refused, mean wife that I am. So-- He's quilt thrilled, and I'm quite happy to be done with the dang thing.
By the way, it doesn't look square because I pinned it quickly up on my design wall. But the corners really are square.
This is from a pattern by Caryl Bryer Fallert. Having made this one, I learned all sorts of things about what NOT to do. Fallert's pattern is fine. It was my (ahem) short cuts that made life harder.
My lessons aren't going to do me any good, because I'm not making any more of these. But in the interest of education, I'll share my lessons in case anyone else is inclined to take a perfectly good pattern and wander off into their own "I'll just try this instead" detour:
1. Do not piece the foundation from left-over bits of interfacing...go buy a big piece. You will think you are saving time and money and being clever. But you need this foundation flat, flat, flat. You'll think your pieced foundation is fine. Ha. Think again.
2. Think carefully about using a very linear background fabric (like stripes or checks) because trying to make sure the horizontal lines really do stay horizontal isn't fun.
3. When you've made your tuck strips and laid them out in the right order on your table, don't turn your back because inevitably a cat will jump up and disturb them, and the phone will ring, and while you're on the phone a creative child will wander into your studio and decide that those colorful strips look so fun that she'll have a grand time rearranging them all.
4. When you've arranged your tuck strips AGAIN in the correct order and pin them up on the design wall, pin them high enough so that cats can't reach the dangling ends and pull them down again. Enough said.
5. After you've gone ahead and pieced the foundation anyway despite my good advice (yup, I know your type) and after you've sewn the tucks on you find that it's slightly distorted and not flat (see #1), do not cut the foundation stabilizer apart. Trust me.
6. Do not think that you can straighten it all out by sewing it onto the batting alone, and you'll worry about the backing later. NO! Worry about the backing now, take the time to figure it all out, and then sew everything together. I don't even want to talk about this step any more.
Other than that, it was a breeze. Now, don't get me wrong...it actually was fun. The tucks are a clever idea and the illusion they create is quite interesting. For my goal to do a quick (ha) project that Roger would like and that would be impressive, this fit the bill.
Still, I'm happy to be on to other things. And Roger is happy to have this colorful piece to hang in his office.
Thanks for the instructions. Despite your construction deviations, it is quite stunning. I really want to get mine finished now.!
ReplyDeleteWhat a lucky guy. Looks good I love the bright colors
ReplyDelete