
Anyway. On to quilting content!
I mentioned a few weeks ago that I watched Ricky Tims' DVD "Grand Finale," in which he shows various quilting and finishing techniques. I was taken with a binding technique he shows there, where you end up with a really tidy bit of piping in the binding. So, on Tuesday I decided to get my "Green Fields" quilt finished.
First, I sewed some #3 perle cotton into a strip of fabric for the piping, using a pintuck presser foot. The pin tuck foot has grooves that slide right over the cord and keep it snug while you sew it in place. Very easy.

Then, I sewed the piping down the middle of the actual binding strip. You can see I set up a masking tape guide to make sure I was keeping the strip even. Again, using that pin tuck foot really helped to keep that piping sliding right in place.

I pressed the strip, wrong sides together, and voila! I had binding ready to go with piping inserted.

Then, I lined up the edge of the binding with the edge of the quilt, and sewed the binding on to the BACK side of the quilt.

And here was the coolest part: I used a edge stitch foot to sew the binding to the front of the quilt. This special foot has a metal rudder like thingie that slots right into the groove you want to sew into...so it guides you along and the needle follows, sewing perfectly into the groove. I'm not big on "in the ditch" stitching, but if I were gonna do it, this is the foot I'd use.

The result of this method is that the binding gets machine-sewn to the quilt, so it's very sturdy. And the stitching line is hidden between the piping and the binding, so it looks exceptionally neat. On the dvd, Timms shows how to do mitered corners so they work beautifully, too.
And here's the result:
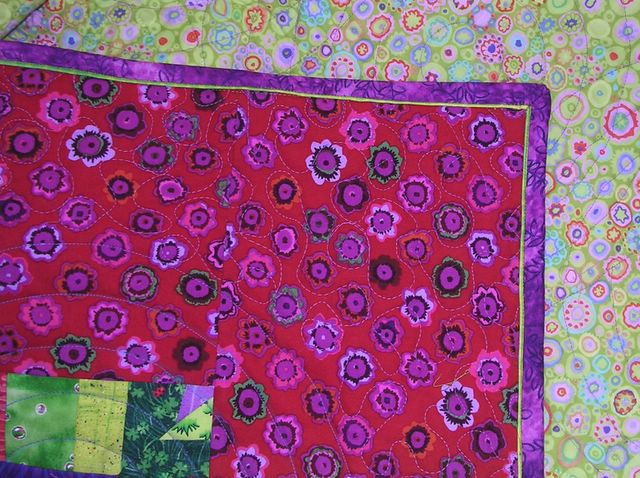
Cool, huh? I am very impressed with myself.
I don't expect that I'll do this on many quilts, but I really like it on this one and was pleased to work through his well-demonstrated technique.
Maybe tomorrow I'll get to play with fusing, as I've been dying to do...
Wow! Brilliant!
ReplyDeleteGlad you and your family are ok after the vandalism. As you said, it is just "stuff". The most important thing is the family and being able to get through this together.
How about a picture of the whole quilt?
ReplyDeleteThat looks great!
ReplyDeleteAnd what Melody said - I'd like to see the whole quilt too.
I love the results of this process!! I also know that I will probably never do it myself...
ReplyDeleteI'm glad to hear you are coping so well after your awful experience.
ReplyDeleteThank you for sharing the finishing technique of your quilt. I have been wondering about that Ricky Tims DVD and now you've convinced me that I have to have it, so one is on it's way to my place.
I'm looking forward to seeing your quilt in all its glory!
Oo! I like the piping. That's a cool technique!
ReplyDeleteI, too, used his technique, admire his quilting skills, and came up with a beautiful binding. However, it ended shortly after that. The tiny cotton stuff in the binding shrunk when I washed the quilt and then it made the bottom cup. I had to cut it all off--again (!) and start over again. This time I just used my tried and true binding and it got a first place in the next show.
ReplyDeleteBe sure to pre-shrink the cotton thread for the piping as well as the other fabrics involved--if you've pre-shrunk the quilt or you'll have various levels of shrinking happening.
There's another lady who does "Piped Hot Bindings" and she recommends using poly cord for that reason. Wish I'd visited her technique first.
Lynn
Oh, nice quilt and pretty binding. Congratulations!
This comment has been removed by a blog administrator.
ReplyDelete